Your personal workspace is a complete organization already: it has a managed team, a managed project and a wallet. What it does not have is other people. When you need colleagues, shared spend and separate budgets per workload, you create a real organization — and that means three layers, each with a job.
| Layer | What it is for |
|---|---|
| Organization | The isolation boundary. Members, billing and policy live here, and nothing crosses to another organization |
| Team | Who owns a project. Team membership is provenance and a precondition for issuing keys — it grants no access by itself |
| Project | What actually spends. It holds the wallet, the keys, the assigned products and the usage |
Before you start#
You need to be signed in. Anyone signed in can create an organization; you become its Owner.
1. Create the organization#
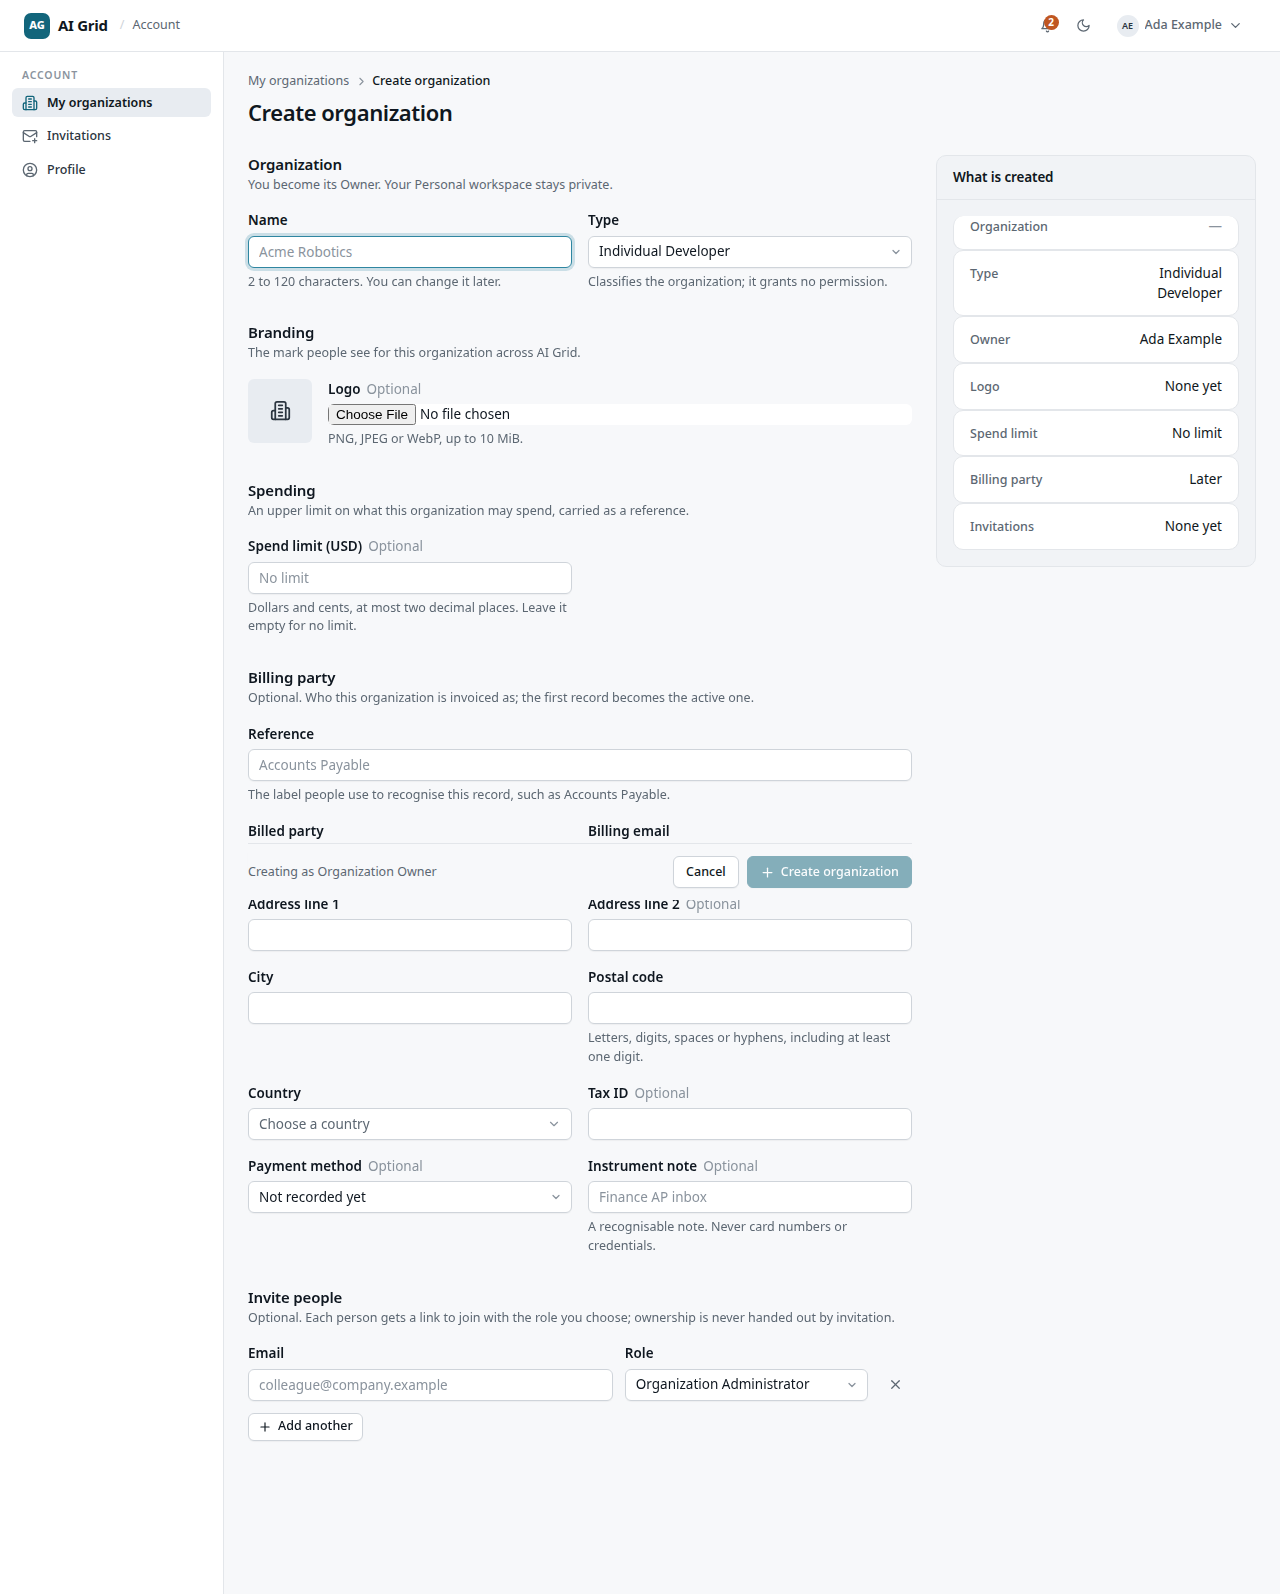
Open My organizations → Create organization and fill the sections:
- Organization — name and type.
- Branding — an optional logo.
- Spending limit — an optional organization-wide ceiling in USD.
- Billing party — who is billed.
- Invitations — optional email and role rows, if you already know who is joining.
You land as Organization Owner. If a side step fails — the logo, the billing record, an invitation — the Overview banner lets you retry it without redoing the whole form.
2. Create a team#
Open Teams → New team. You become its Team Owner.
A team keeps exactly one owner: promoting a member transfers ownership and steps the previous owner down. Teams contain people, and there are no nested teams.
3. Create the project#
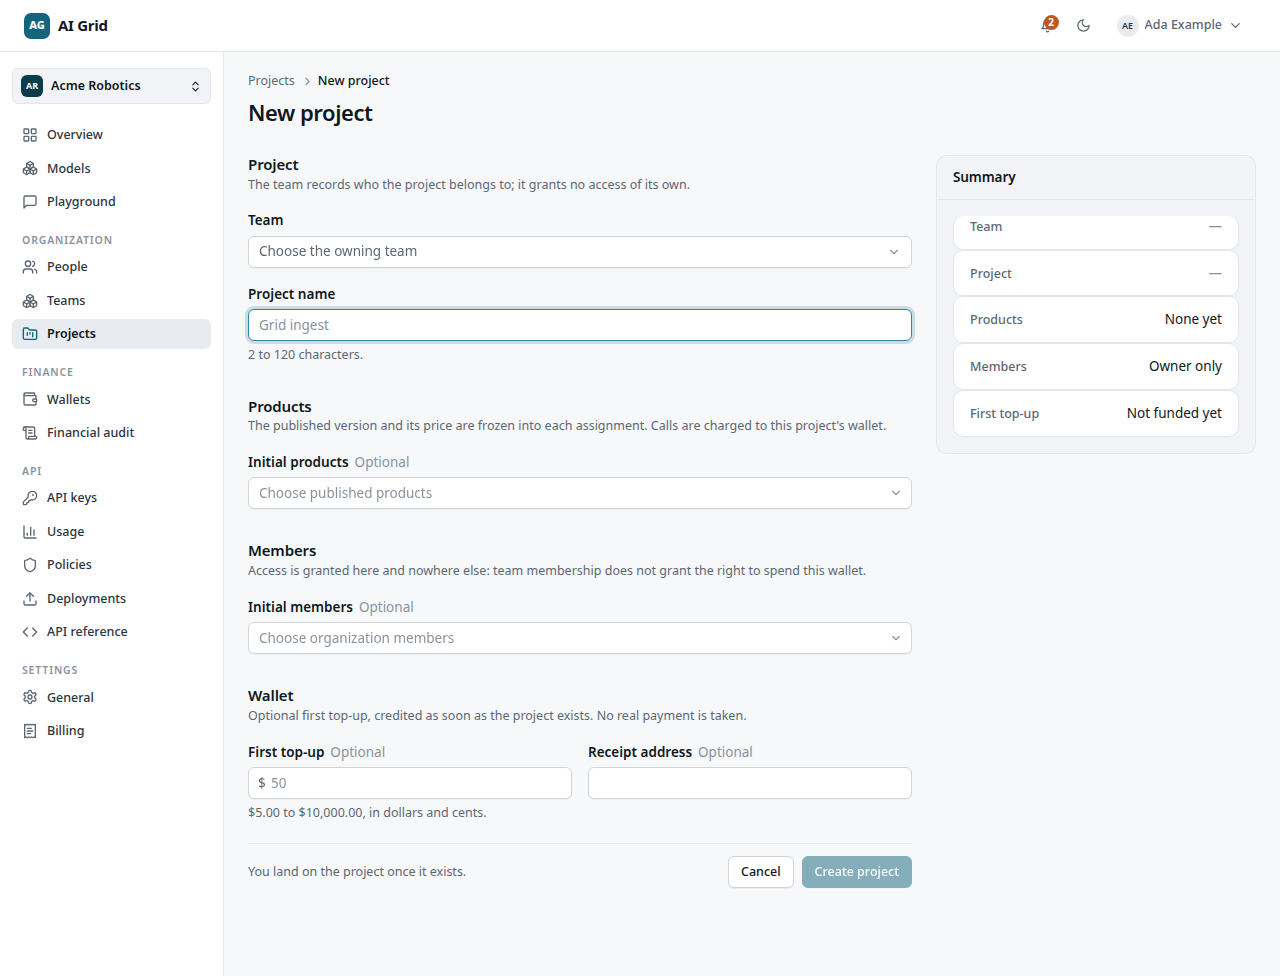
Open Projects → New project. The form has five parts:
- Team — the owning team. A project belongs to exactly one.
- Project name.
- Products — initial assignments, each accepted at its frozen price.
- Members — who to add, with their project role.
- Wallet — an optional first top-up. Pick a Bill to record; if none exists, add one under Settings → Billing first. Funding credits test funds — no real payment is taken.
A summary card recaps every choice. Click Create project.
Check it worked#
Organization → Projects lists the project with its Team, Owner, Wallet and Status. The wallet reads Never funded until the first top-up lands.
If it did not#
| What you see | What it means |
|---|---|
| No New project button | Creating needs a team owner or an organization administrator |
| The Wallet section is unavailable | You cannot fund — that is Owner-only. Create the project and let an Owner top it up |
| No Bill to record to choose | Add one under Settings → Billing, then return |
| A NoAccess state | The server refused; the UI reaching the page does not mean your role passes |
Next#
- Give a project a model — the project cannot call anything yet
- Invite your team — people, and the grants that matter
- Projects — the full record, its six tabs and its wallet